REST API Overview
Authorize a web application
Web applications are built using a server-side framework, which runs on a private server to secure communication with the authorization server. This ensures that the application's source code or configuration remains inaccessible to the public and allows for using a client secret.
NOTE: Your client credentials carry many privileges, so be sure to keep them secure!
- Do not put your client credential information (clientid, client secret or access tokens) in publicly accessible code where they can be discovered.
- Store them in a safe place on the backend (server).
Authorization code flow
Web applications can use the OAuth 2.0 Authorization Code Flow to enable data owners to authorize third-party apps to access user data. This flow includes features like customer login and consent handling to obtain authorization from the resource owner.
The following steps provide an overview of the process.
- The application makes a request to the authorization server endpoint.
- The end-user provides their authentication information and consents for the application to access resources on their behalf.
- The authorization server returns an authorization code to the Redirect URI specified when creating the application.
- The application uses the authorization code to obtain an access token from the authorization server.
- The application uses the access token to call the API on behalf of the user.
sequenceDiagram
    participant ro as Resource Owner
    participant app as Application
    participant as as Authorization Server
    participant api as iTwin API

    ro->>+app: Connect to application
    app->>+as: Request authorization code
    as->>ro: Redirect to login and consent
    ro->>as: Sign in and consent
    as->>-app: Authorization code
    app->>+as: Exchange authorization code for an access_token
    as->>as: Validate client_id, client_secret, scope and redirect_uri
    as->>-app: Granted access token
    app->>-ro: Signed in

    ro->>+app: Perform action
    app->>+api: API request with the access token
    api->>-app: API response
    app->>-ro: Render content
Set up authorization for your app
The following steps outline how to implement the authorization code flow in your application. Once you have registered your app, you can begin to obtain the access token.
-
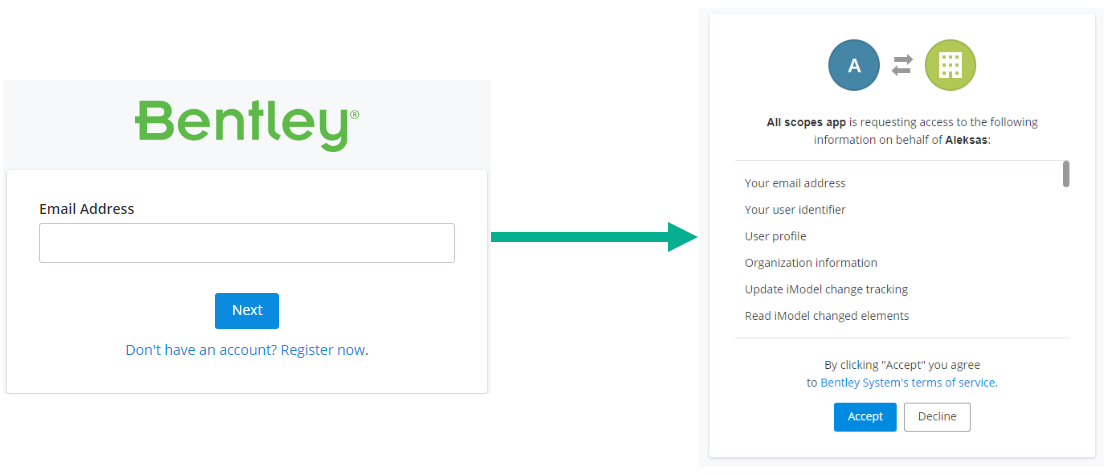
When the user opens the web app, redirect them to the authorization server endpoint,
https://ims.bentley.com/connect/authorize. This will provide a login screen to the end user for authentication. The request for an authorization code requires the following parameters:Parameter Description response_type Set tocodeto indicate that an authorization code is needed.client_id The ID of the app you created. If you forgot the ID, find it on the My Apps page. Locate your app in the list, and the Client ID is in the same-named column.redirect_uri The callback URL you entered when registering your application. The returned authorization code is sent to this URL. In this case, the callback URL must behttps://developer.bentley.com/redirect-tutorial.scope Add theitwin-platformscope assigned to your app during registration. When requesting a refresh token, include the scopeoffline_access. Separate multiple scopes with a space. Your end user will consent to the app accessing this information on their behalf during the login process.state (Optional) Used by the client to maintain state between a request and a callback. Recommended to prevent cross-site request forgery. The authorization server includes this value when redirecting the user-agent to the client. -
The user signs in to authenticate and consents for the application to access resources on their behalf. This page is managed by the Bentley authorization server and does not require any implementation in your application.
Once authenticated, the Bentley authorization server returns an authorization code to the Redirect URI registered with your application. Extract the
codein the response from theredirect_uri.https://example-rediect-uri?code=<code>NOTE: Authorization codes are time-sensitive. If your code expires, send a new request to the authorization server for a new code.
-
Exchange the authorization code for an access token, by sending a request to the token endpoint.
POST https://ims.bentley.com/connect/token
The authorization request requires the following parameters:
authorization_code Indicates the type of grant being used. This tells the service you are exchanging the code for a token.-
The authorization server confirms the information sent in the request and returns an access token. Bentley's authorization server completes this step. There is no implementation needed in your application. A successful response includes the
access_token, an expiry of 3600 seconds, and arefresh_token. Tokens are Bearer type, which must be specified in your API calls. -
Use the access token to call the API. Tokens are added to the
Authorizationheader withBearertype in subsequent requests. Successfully sending a request to an API requires the end user to have the correct account permissions. Use the Access Control API to ensure your user can access the required resources.
Authorization request example
https://ims.bentley.com/connect/authorize?response_type=code&client_id=<client_id>&redirect_uri=<redirect_uri>&scope=<scope>&state=<state>
Token request example
curl https://ims.bentley.com/connect/token -X POST --data-urlencode grant_type=authorization_code --data-urlencode code=<authorization_code> --data-urlencode client_id=<client_id> --data-urlencode client_secret=<client_secret> --data-urlencode redirect_uri=<redirect_uri> --data-urlencode scope=<scope>
Was this page helpful?